

Disclaimer: I was sent the wallpaper from OhPopsi to review free of charge, but words and pictures are mine.
It’s been a while since I shared a home decor update (you can see them all here). The best part of a year in fact; I concede I’ll probably not become an award winning home interiors blogger at this rate.
The primary reason for the lack of output is that we’ve not really done much. After the walls fell off in the front room, we went off the idea of stripping the wallpaper in the bedroom, worried that it too would become a far more costly endeavour than we had anticipated. And then, as it does, time just slipped away. It’s very, very easy to just live with almost anything, as every 70s-decor nightmare we looked at when buying a house can attest to.

Plans for our big white bedroom
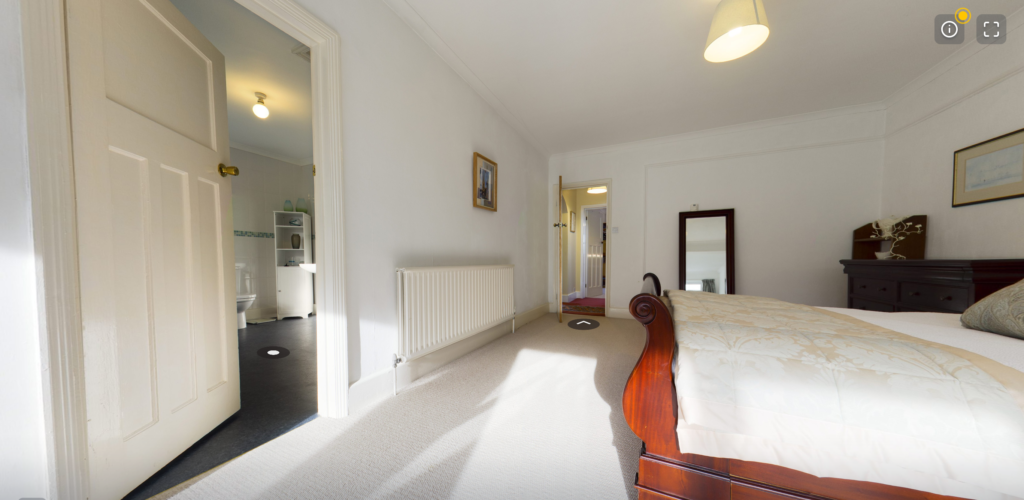
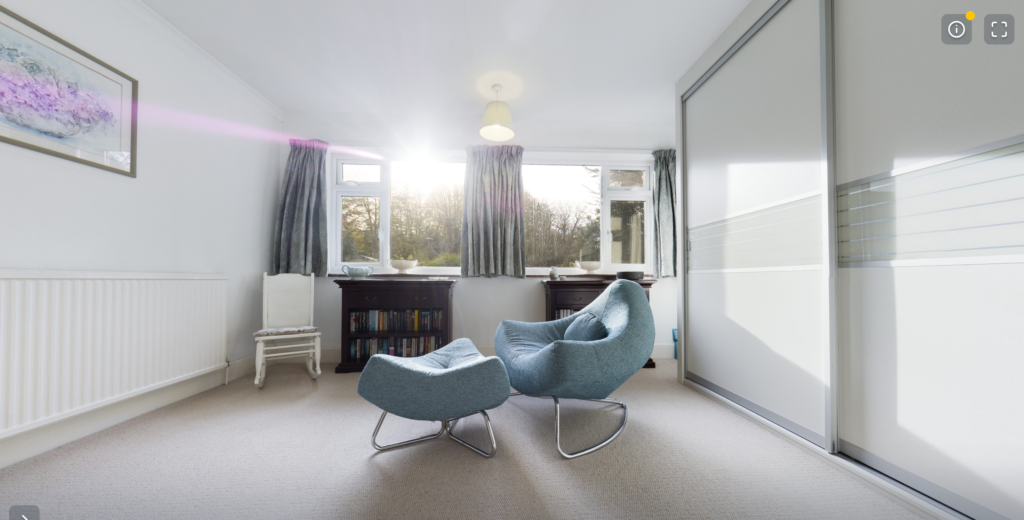
Our bedroom is about 8 metres long; probably bigger than the entirety of my first rented flat. From brief chats with the neighbours, I am led to believe that the people that owned it 20+ years ago and extended it had it set up as a little granny flat for their elderly mum, who was possibly Barbara Cartland based on the awful pink and flowery wallpaper lurking beneath the iffy paint job.
When we moved in, it was essentially a big, boring white box. I don’t have any decent ‘before’ pictures (another reason I won’t crack the interiors scene), but you can get the idea from the original estate agent pictures:
And one from when we first moved in:

If money was no object, the room could quite easily be split into two good-sized bedrooms by putting window in the external wall at the lower end, fiddling with the electrics, and sticking a partition wall up. Unfortunately, money is an object, so that’s not happening.
For the time being, our idea was to make it a bit less spartan and a lot cosier by using furniture to split it in into a bedroom area and a ‘snug’. Not only would it make the room seem less cold and bare, but when the kids are older and taking over the other rooms, we can hide from them. Or maybe each other depending on how it goes.
Wallpapering with OhPopsi ‘Blossom’ wallpaper
This was when I got in touch with OhPopsi who do a range of bold and bright murals and wallpapers. I originally favoured their Blossom wallpaper in ‘seascape’, a floral pattern in muted blues and beiges (left) before throwing caution to the wind and going for the much brighter and far less subtle ‘teal natural‘ on the right. It’s also available in a range of other colourways but we wanted it to match the furnishings already in the room.

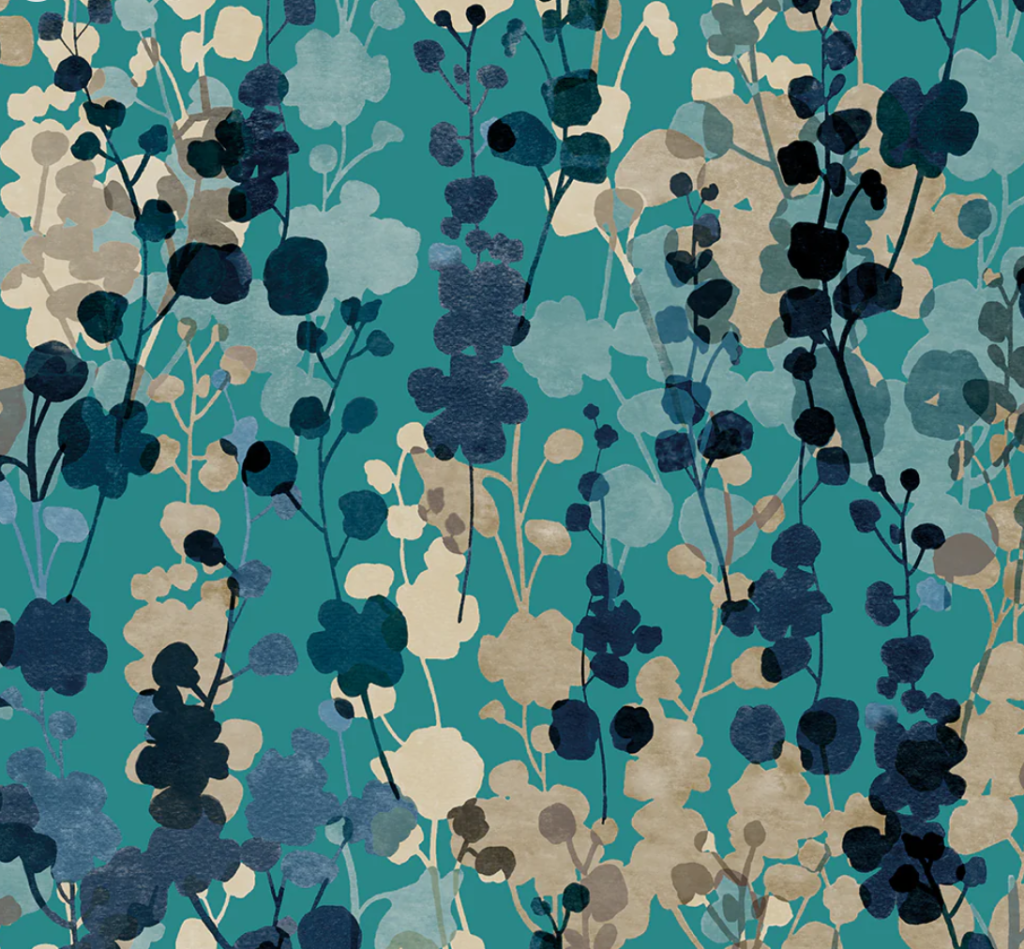
Fast forward six months or so, and the wallpaper was sitting in the wardrobe, still waiting to be put up.
I do try very hard not to let reviews hang over my head – and certainly not for that long – but the idea of potentially having to replaster such a huge room was too scary so we just ignored it and hoped it would go away.

We eventually made a start by having the radiator at the far end removed. Two big radiators in one room wasn’t really necessary, and it made arranging the furniture difficult.
When that was done, once again we sat on it for a bit. However eventually, and after moving all the furniture about, we started to strip the old paper from the walls. It wasn’t actually as bad as we were expecting, and although a little filling was necessary, we didn’t have to replaster.

The actual papering part didn’t take very long; much less time than the preparation of the wall.
With this type of wallpaper, the paste is applied to the walls and then the paper – cut ready to match – hung and smoothed out, then a knife used to cut the edges off.


The wallpaper itself is thick and heavy, and fairly easy to hang. Once it was up it covered a multitude of sins on the wall and even though it was our first time papering, I thought it looked really good.
We used five rolls for the 8m wall (it was touch and go, but we made it!) which have an RRP of £73 each.
The bed area
We moved our bed to the far end of the room by the window, and reupholstered the headboard with a navy coloured quilted throw from Asda and a staple gun, which took no time at all.


Our original plan involved installing some timber slats from floor to ceiling to partition the room, but currently we have a chest of drawers (wallpapered on the back to hide the cheap chipboard) and some large plants which act as screening, and I quite like it. It’s possible we might do something more permanent in future, but again it’s all reliant on time and money!


The snug area

The snug area at the lower end of the room as you enter has another chest of drawers (all white furniture is, predictably, old and from Ikea), a teal velvet sofa (bought last year thanks to a particularly sneaky and well placed Instagram advert) and a TV.
It also functions as a dressing area with wardrobes and a full length mirror.

I love it; I feel like I’m going to bed in a posh hotel suite every night. We still need to decide what to do on the white wall behind the sofa – possibly a picture wall – but for now I’m really happy we’ve managed to make it into a lovely, really cosy space without spending too much on it.

Thanks to OhPopsi for supplying the wallpaper, and my partner for doing the hard work!