
I have a confession. I’m a complete magpie for old pictures. There are boxes and boxes of them throughout my house, crammed inside cupboards, lodged in drawers. That grainy photo of my grandparents frozen in impossible youth. There’s the downright funny one of my mom with a 70s perm defying gravity. My very own school picture, with a sneer only a teenager can achieve. This isn’t just a picture; it’s all part of my history. And for decades they were relegated to the dust. Sounds familiar?
Then I discovered the magic of a gallery wall. I’m not talking about a perfectly matched showroom set. I mean a wall that is messy, personal, and utterly mine. With a little help from tools like old photo restoration software, I was able to bring those images back to life. It’s the best conversation starter I have, and it genuinely makes me smile every single day. Putting it together felt daunting, but I learned it’s just a series of small, manageable steps. Let me walk you through how I did it.
Step 1: Choosing the Story I Wanted to Tell
My first step was the most enjoyable. I emptied those memory boxes onto my living room floor. I got comfy and really looked at each photo. Not just a glance, but a proper look. I started seeing connections I’d never noticed before. My great-aunt’s stubborn smile was the same as my cousin’s. There was a theme of family holidays by the British seaside, rain or shine.
I realised I didn’t have to tell every single story. My wall needed a heart. I decided to focus on “partners in crime” – couples in my family, from my grandparents to my best friend and her husband. It gave me a framework. So, my advice? Pick a thread. It could be “the women in our family,” “first days of school,” or just “the biggest, most genuine laughs.” Choose your anchor photos, about 10-15, and then a handful of extras for flavour.
Step 2: Restoring and Preparing My Photos
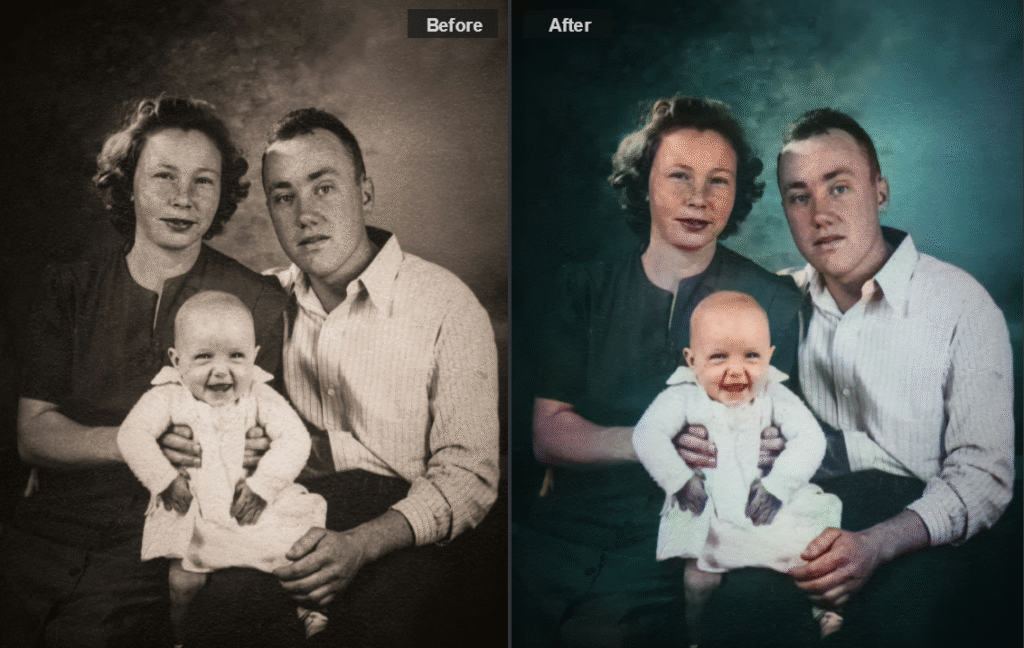
Let’s be real, some of my favourite photos were in a sorry state. My grandad’s portrait had a nasty crease right across his face. Another was so faded he almost looked like a ghost. This part felt a bit like archaeology, uncovering the original image beneath the damage.
I scanned all my old photos. For the really rough ones, I knew I needed help. I asked a professional to fix one particularly precious one, but for the others, I decided to try it myself. I found some brilliant software and just had a go. I was shocked at how easy it was to smooth out cracks, bring back colour, and wipe away those weird yellow spots. It’s not about changing history, it’s about giving it a good clean.
For my modern digital photos, I found that converting a few to black and white was my secret weapon. It instantly gives a timeless feel and helps all the different eras blend together seamlessly.
Step 3: Planning My Layout
This is where I almost gave up. I pictured myself making my wall look like a nail-pocked Swiss cheese. Then I discovered the “paper trick.” It saved my sanity.
I took old newspaper and wrapping paper and cut out shapes the exact size of all my frames. Then, I played. I arranged them on the floor over a whole afternoon. I moved them around, walked away, came back, and moved them again. I even taped them to the wall with painter’s tape to live with it for a day.
I fell in love with the “salon style” look – a bit eclectic, a bit messy, but perfectly balanced. I started with my favourite, largest photo slightly off-centre and built out from there. My golden rule? I kept a couple of inches of space between each frame. It stops everything from feeling cluttered and chaotic.
Step 4: Mixing Old and New for a Timeless Look
This is where the real magic happens, I promise. I placed a stark, serious black-and-white portrait of my great-grandmother right next to a vibrant, colourful shot of my niece making a similarly serious face. The connection was instant and powerful. It gave me goosebumps .
I also mixed up my frames. I used a chunky, modern black frame for an old photo and a delicate, vintage gold one for a new one. What ties it all together? The mats. I used the same crisp white mat inside every single frame. It’s the simple trick that makes any combination of frames and photos feel like a curated collection, not a jumble sale.
I even added a few non-photo items. I framed a handwritten recipe from my nan and put my dad’s old scouting badge in a tiny shadow box. These textures make the wall feel richer and more personal.
Step 5: Adding My Personal Touches
The final step is all about the details that make it uniquely yours. I wrote little labels on nice card stock. Not just names and dates, but a tiny story. “Arthur & Jean, 1952. He bought the ice cream, she dropped it.” It brings the people in the pictures to life for anyone who sees them.
I also thought about the practical stuff. I found some lovely, vintage-style brass hooks to hang everything. In the evening, I sometimes drape a string of delicate fairy lights over one corner of the arrangement. It casts a warm glow and makes the whole wall feel like a living, cherished exhibit.
Bringing It All Together
Developing a gallery wall that narrates your family history is a process. Deciding on which photos to select, having them restored, planning a composition, and adding your own touches all require time. However, the rewards certainly justify the time expended. Glancing at my wall gives me a memory, a smile, or a story that I hadn’t remembered in a long time.
And if you’re thinking of doing something similar? Start small. Be your own family curator. Pull out those boxes and start your story. Pick photos that mean the world to you. Restore it, frame it, hang it. That’s your first sentence. The rest of the story will come.